Effortlessly schedule and share shifts with RotaPlanner.app
Start a trial today.
Create a Rota Online (Free AI Rota Builder)
 By Kieran - Founder
How to create a rota with RotaPlanner
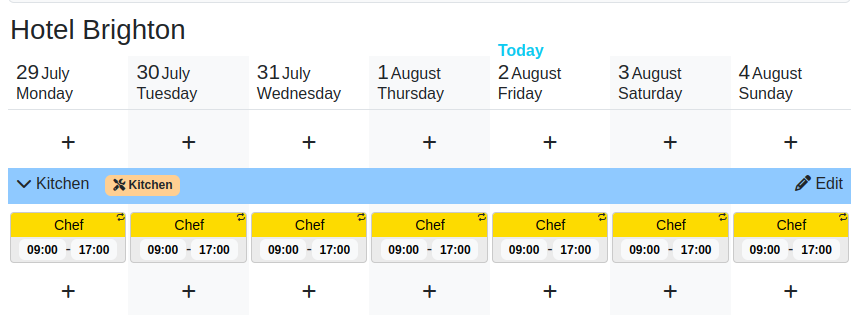
Today I'm going to walk you through the process of creating a simple rota for a hotel like the one seen above.
I will only be doing one location here but you can add multiple locations and assign staff to specific locations if required.
Locations are simple, they are added via the Locations tab accessible from the left hand menu.

Once you have your locations added we can break your shifts down by role.
Setup sections based on shift roles
Once you've added your locations you can add some roles (also known as sections) within your locations. In our hotel example above you can see sections added for 'Reception' and 'Cleaners'.
Add a section by clicking the 'Add section' bar at the bottom of your location in the main calendar view.

When adding a section you have the option to add some required skills for that section.
Adding the required skills to your section make it easy to assign the right staff to the shifts.
We will assing some skills to our staff in the next step.
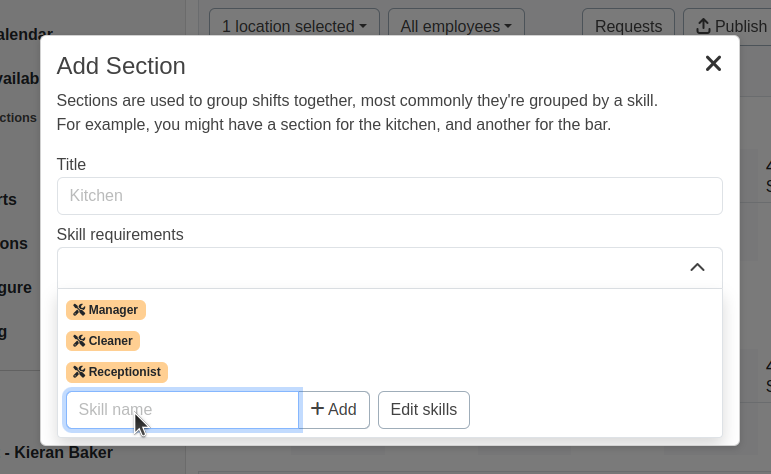
As you can see in our example I've got 3 skills of 'Receptionist', 'Cleaner' and 'Manager'.
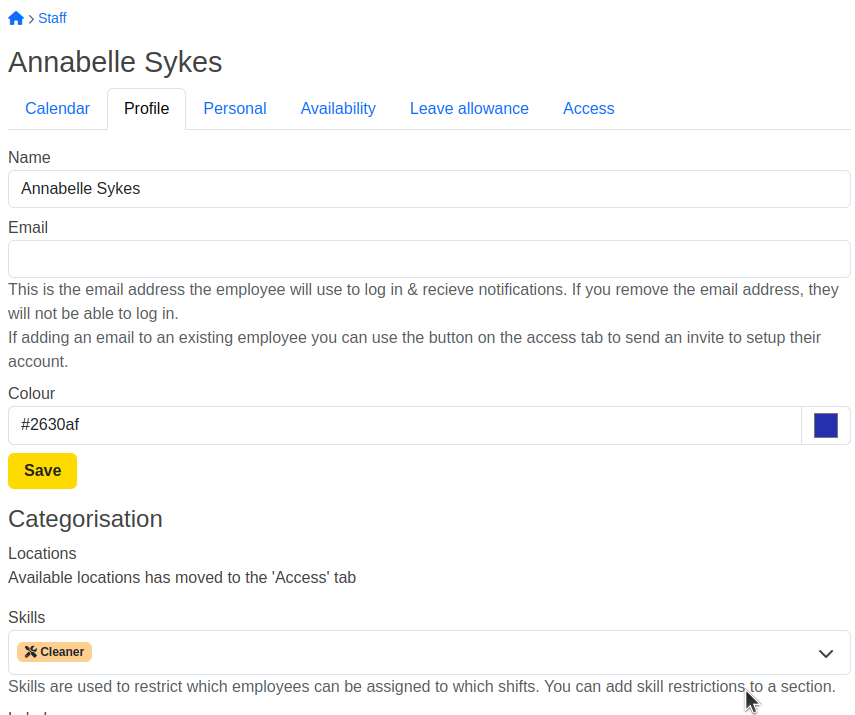
If you navigate to the 'Staff' page you can assign these skills to your staff.
Adding your shifts
You're now ready to start adding your shifts. You can do this by clicking on the plus icon underneath the date you want to add a shift for.
You likely have a relatively set shift pattern that occurs each day or week.
If this is the case you can use the 'Recurrence' option to set up your shift to repeat.
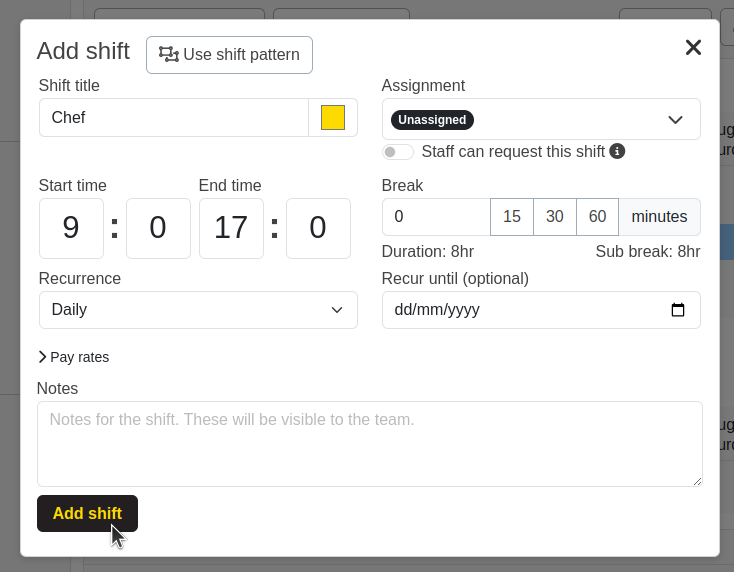 I would generally recommend you keep the assignment empty when creating a recurring shift,
so that you can assign the shift on a per week basis as required.
Though if you have quite a fixed structure of when someone works you may want to specify them on the recurring instance of the shift.
I would generally recommend you keep the assignment empty when creating a recurring shift,
so that you can assign the shift on a per week basis as required.
Though if you have quite a fixed structure of when someone works you may want to specify them on the recurring instance of the shift.
You can see now we have some unassigned repeating shifts in our calendar.
This creates a template for us to build our rota from every week.
We can now go through and assign the shifts to our staff or delete individual shifts as required.
Assign your shifts by clicking on the shift and selecting the staff member(s) you want in the Assignment selection.
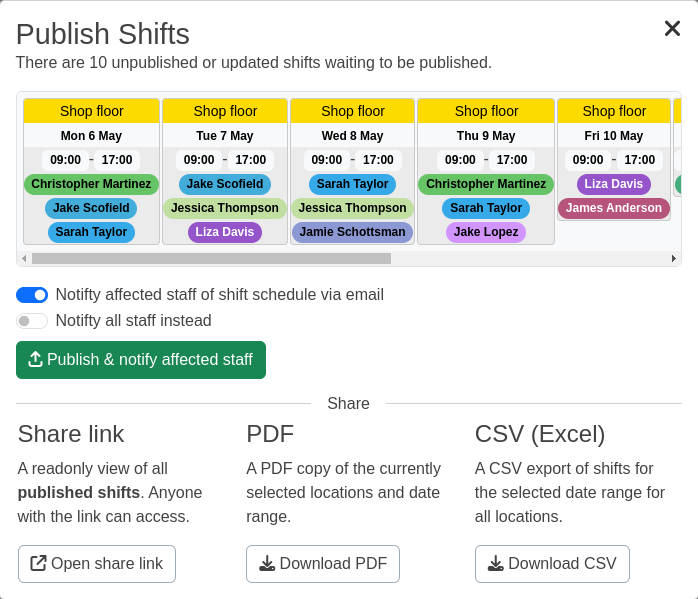
Share your rota
Once you've finished making your work rota for the week you should publish it. Publishing the shifts makes them available to any employees who have access to the system to view.
You can also share the rota by:
- Downloading the PDF version - popular for printing
- Sharing the link to the rota (requires shifts to be published)
- Downloading the Excel/CSV of shifts
All these actions can be done via the publish button at the top right of the calendar toolbar.
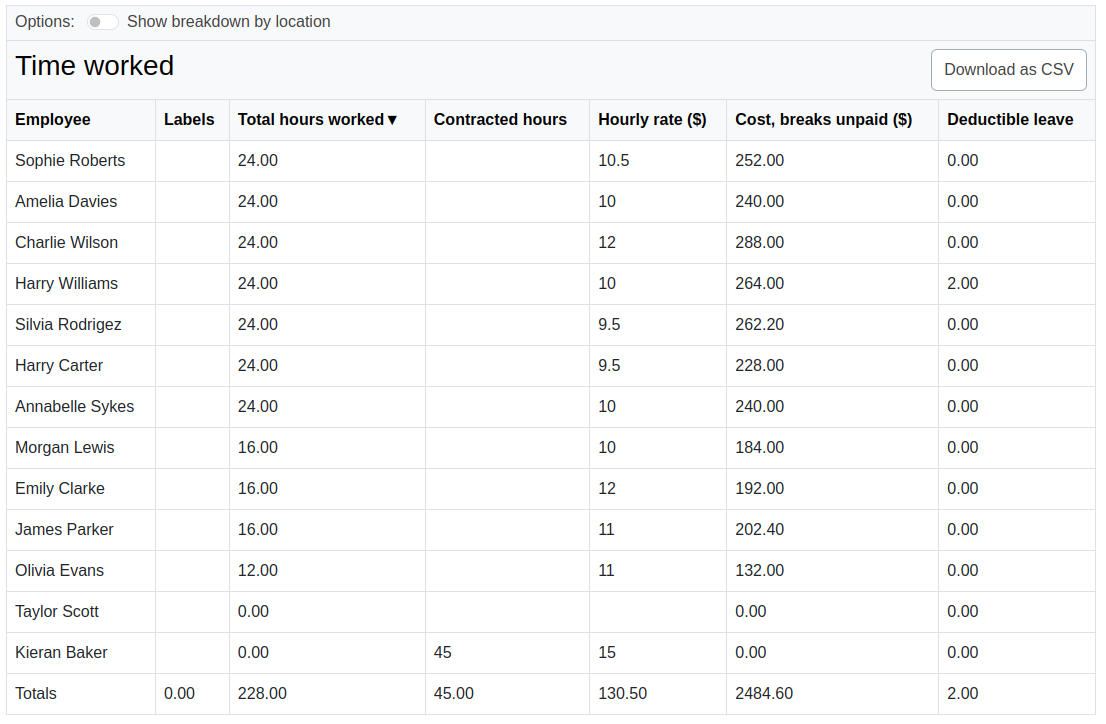
Keep track of hours worked and payroll
Once your staff have worked their shifts you can keep track of the hours they've worked.
You can do this by scolling down to the 'Time worked' table beneath the main rota calendar.
Here to help!
If you have any questions or need help setting up your rota please don't hesitate to get in touch. You can find our contact details on the support page.