Effortlessly schedule and share shifts with RotaPlanner.app
Start a trial today.
How to Use RotaPlanner's Automatic Shift Scheduler
We've revolutionized shift scheduling with our AI-powered automatic shift scheduler! Now you can automatically assign the best employees to shifts with just a few clicks.
To get started with our automatic shift scheduler, you only need:
- Shifts to be filled
- Employees to schedule
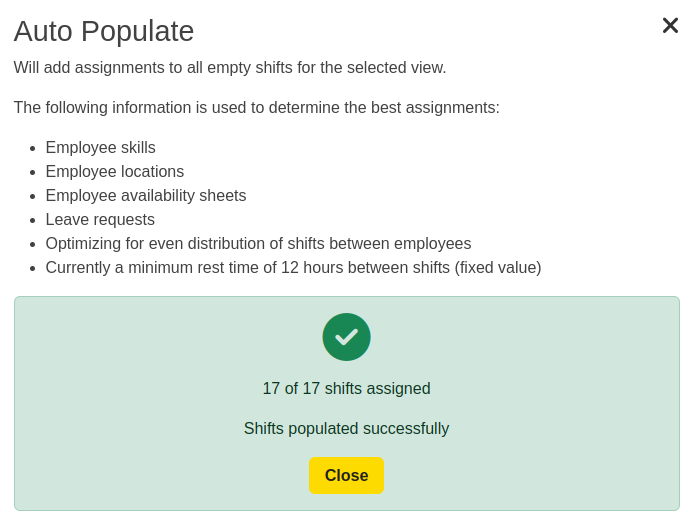
Launch the automatic shift scheduler by clicking the 'Auto populate' button in the toolbar.

Our intelligent shift scheduling system ensures fair distribution of work by prioritizing employees with the least assigned hours. The scheduler aims to distribute hours evenly across your team for any period you select, whether it's a week, month, or longer.
How Our Automatic Shift Scheduler Works
The shift scheduling algorithm considers multiple factors:
- Employee qualifications and skills
- Location assignments
- Staff availability
- Target working hours
- Mandatory rest periods between shifts (minimum 12 hours, customizable in future updates)
Here's how our automatic shift scheduler creates your schedule:
- Data Collection: Enter your employee information and required shifts. More detailed information leads to better scheduling results.
- Employee Details: Include important information such as:
- Working availability
- Desired hours
- Qualifications
- Weekly hour limits
- Work locations
- Shift Requirements: Specify shift details including:
- Timing details
- Required qualifications
- Staffing levels needed
- Work location
- Schedule Generation: Click 'Auto populate' to start the automatic scheduling process.
- AI Processing: Our advanced AI analyzes all inputs to create an optimized schedule.
- Equal Distribution: The system prioritizes fair workload distribution, starting with employees who have worked fewer hours. Unassignable shifts remain open for manual assignment.
- Smart Optimization: The scheduler considers all variables including skills, locations, availability, and contracted hours to create the most efficient schedule.
- Final Schedule: A complete shift schedule is generated based on your requirements.
Real-World Examples
Here's how our automatic shift scheduler works in practice:
- For a retail store with sales associates and stockroom staff, the scheduler can automatically assign shifts based on role-specific skills and availability patterns.
- In a multi-location business, the system can handle complex scheduling across different sites while respecting employee location preferences and restrictions.
Advanced Features
Our automatic shift scheduler includes these powerful features:
- Daily availability management
- Vacation and leave integration
- Multi-location support
- Skill-based assignment
Maximizing Scheduler Effectiveness
To get the most from your automatic shift scheduler:
- Keep employee information current and complete
- Maintain updated availability records
- Regularly update skill and qualification information
- Review generated schedules and fine-tune as needed
Schedule Customization
After the automatic scheduler creates your schedule, you can:
- Make manual adjustments to assignments
- Add or remove shifts
- Accommodate unexpected schedule changes
This flexibility ensures you can perfect your schedule while saving time with automation.
Future Developments
We're continuously enhancing our automatic shift scheduler with new features and improvements. Your feedback during this process is invaluable and helps us make the system even better.
Start Using RotaPlanner's Automatic Shift Scheduler Today
Transform your scheduling process with our AI-powered automatic shift scheduler. Available with all RotaPlanner plans - check our pricing page for details.
Experience the future of shift scheduling with a free RotaPlanner trial today.
Start Free TrialAdd your comment
Comments
No comments here yet!